
Major and Minor Scales Guitar Tutorial for Beginners
Category: Music Theory
Unlock the Secrets of Major and Minor Scales on Guitar
Learning major and minor scales on the guitar can feel overwhelming when you first start, especially if music theory isn’t your strong suit. If you've landed here, you’re likely a beginner eager to understand the foundational scales that shape countless songs but unsure where to begin or how to practice effectively. Maybe you’ve tried finding tutorials, but they either dive too deep into theory or skip practical steps that make scales meaningful on the fretboard. This post is designed specifically for you: a beginner guitarist who wants a clear, structured, and approachable guide that blends essential music theory with hands-on guitar techniques.
Here, we'll break down the anatomy of major and minor scales, demystify scale formulas, and provide simple fretboard patterns you can start playing right away. Unlike other tutorials that can feel fragmented or overly technical, this blog post offers a logical progression—from understanding scale construction to applying it in your practice routine. Plus, we’ll touch on how these scales connect to piano concepts, giving you musical versatility and a richer perspective.
By the end of this tutorial, you’ll not only play major and minor scales confidently on your guitar but also understand why they sound the way they do — setting a solid foundation for your musical journey. Ready to get started? Let’s dive in and make sense of scales the right way.
- Unlock the Secrets of Major and Minor Scales on Guitar
- Understanding the Basics: What Are Major and Minor Scales?
- Scale Construction: The Formula Behind Major and Minor Scales
- Major Scale Patterns on Guitar Fretboard: The Five Essential CAGED Shapes
- Minor Scale Patterns and Variations on Guitar: Natural, Harmonic, and Melodic Shapes
- Practical Exercises to Master Scale Shapes
- Connecting Theory to Application: Using Scales in Guitar Playing
- Common Mistakes and Tips for Efficient Practice
- Quick Overview: Relating Guitar Scales to Piano
Understanding the Basics: What Are Major and Minor Scales?
Before you start playing major and minor scales on your guitar, it’s essential to understand what these scales are and why they play such a crucial role in music. At their core, scales are specific sequences of musical notes arranged in ascending or descending order, acting as the building blocks for melodies, chords, and entire songs. The two most common types in Western music—and the foundation for countless guitar and piano pieces—are major and minor scales.
What Makes a Scale Major or Minor?
The primary difference between major and minor scales lies in the specific pattern of whole steps and half steps (intervals) between notes. This pattern influences the emotional tone and color of the scale:
- Major scales typically sound bright, happy, and uplifting. They follow a pattern of intervals that create a sense of resolution and positivity.
- Minor scales often evoke sadder, more melancholic, or introspective feelings. Their interval pattern introduces a darker, more emotional quality compared to major scales.
Both scales consist of seven notes before returning to the octave, but the arrangement of whole and half steps changes, affecting the mood and feel of the music.
Why Are Major and Minor Scales Important?
Knowing major and minor scales helps you:
- Understand chord structures: Most chords are derived from the notes within these scales.
- Create melodies: Scales guide what notes will sound harmonious when played together.
- Improvise confidently: Recognizing the scale of a song lets you pick the right notes for soloing.
- Develop your ear: Hearing the difference between major and minor helps with musical recognition and expression.
By mastering these scales, you gain a firm grasp on the foundational language of music—enabling you to play, compose, and appreciate music more deeply, whether on guitar or piano. In the next section, we’ll explore how to construct these scales using simple formulas and translate them onto your guitar fretboard.
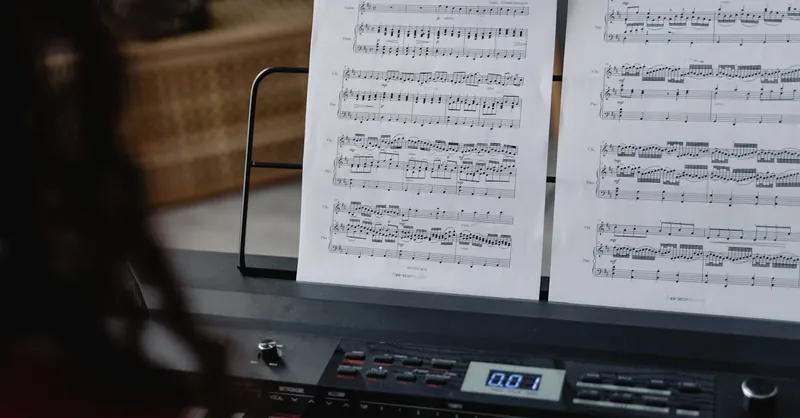
Image courtesy of Tima Miroshnichenko
Scale Construction: The Formula Behind Major and Minor Scales
Understanding the formula or pattern that constructs major and minor scales is essential for mastering them on your guitar and piano. Both scales are built using specific sequences of whole steps (W) and half steps (H) — the smallest intervals in Western music. A whole step equals two frets on the guitar or two piano keys (counting both white and black), while a half step equals one fret or key.
Major Scale Formula
The major scale is constructed from the following interval pattern:
W – W – H – W – W – W – H
Breaking this down:
- Start from the root note (the note you’re building the scale from).
- Move up a whole step twice.
- Move up a half step.
- Then three whole steps consecutively.
- Finish with a half step to return to the octave.
This pattern creates the familiar bright and happy sound of the major scale, and it applies no matter which note you start on—giving you the ability to build a major scale in any key.
Minor Scale Formula
The natural minor scale follows a different sequence:
W – H – W – W – H – W – W
Here’s how it works:
- Start from the root note.
- Move up a whole step.
- Move up a half step.
- Move up two whole steps.
- Move up a half step.
- Finally, move up two whole steps to complete the octave.
This pattern results in the characteristic darker, more emotional tone of the natural minor scale.
Why These Formulas Matter for Guitarists
Working with these whole and half step formulas lets you:
- Understand how scales are built, rather than just memorizing shapes.
- Transpose scales to different keys easily by starting on any fret.
- Visualize intervals on the fretboard, improving your fretboard knowledge.
- Recognize scale patterns across guitar and piano, since the interval structures are the same.
By internalizing these step patterns, you’ll gain a powerful tool for unlocking major and minor scales anywhere on your guitar—and even apply the same logic to piano keys without confusion. Next, we’ll break down how to map these intervals to practical fretboard shapes so you can start playing major and minor scales confidently.

Image courtesy of ROMBO
Major Scale Patterns on Guitar Fretboard: The Five Essential CAGED Shapes
To play major scales smoothly across the guitar neck, it’s crucial to visualize them in manageable sections. This is where the CAGED system comes in—a powerful framework that organizes the entire fretboard into five overlapping scale patterns based on the open chord shapes: C, A, G, E, and D. Each pattern corresponds to a specific position, allowing you to navigate the major scale notes fluently wherever you are on the fretboard.
What Is the CAGED System?
The CAGED system breaks down the guitar fretboard into five anchor shapes derived from open chords. When applied to scales, these shapes provide:
- Clear, repeatable major scale patterns linked to familiar chord forms.
- A way to connect positions horizontally and vertically for seamless scale movement.
- A foundation for improvisation, soloing, and chord-melody fusion.
By learning the five CAGED major scale patterns, you can practice and internalize the major scale in chunks instead of trying to memorize dozens of individual notes. This approach boosts fretboard awareness and improves your ability to transpose scales into any key.
The Five CAGED Major Scale Patterns: Overview
Here’s a quick introduction to the five essential major scale patterns, each rooted in an open chord shape but movable anywhere along the neck:
- C Shape Pattern — Starts near the root note on the 8th fret in the key of C major, outlining the major scale tones linked to the C chord shape.
- A Shape Pattern — Anchored around the 5th fret for the C major scale, this shape mirrors the open A chord’s layout.
- G Shape Pattern — Usually positioned near the 3rd fret, this pattern resembles the form of a G major chord but covers all major scale notes.
- E Shape Pattern — Often the foundation at the open position (1st fret or open strings), this pattern extends the iconic E major chord form across the scale.
- D Shape Pattern — Found around the 10th fret for C major, it’s based on the D chord shape and completes the five-pattern cycle.
How These Patterns Work Together
Each CAGED pattern contains unique scale notes but shares common root notes, acting as “anchors” to link patterns seamlessly as you move up or down the neck. Practicing them:
- Helps you visualize the entire major scale across all six strings.
- Enables effortless key changes by shifting patterns to different fret positions.
- Builds a strong connection between chord shapes and scale tones, critical for fluid improvisation and songwriting.
By mastering these five CAGED-based major scale shapes, you’ll unlock a versatile framework for playing major scales confidently in any key on guitar, deepening your understanding of the fretboard, and paving the way for advanced techniques like modal playing and melodic phrasing. Next, we’ll dive into practical exercises to help you practice these patterns and connect them smoothly.
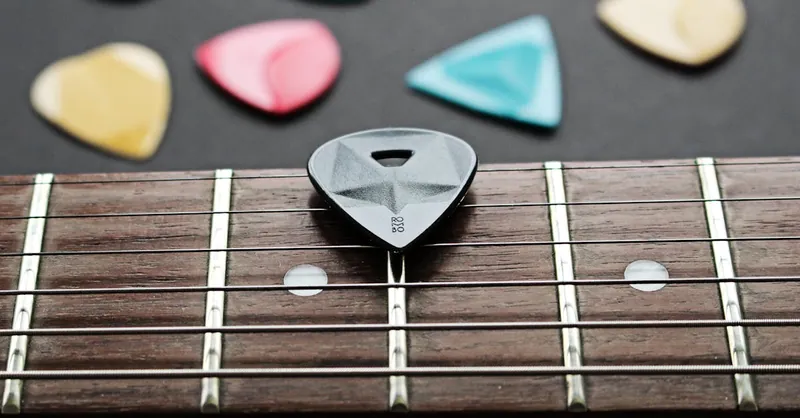
Image courtesy of ROMBO
Minor Scale Patterns and Variations on Guitar: Natural, Harmonic, and Melodic Shapes
After mastering the major scale patterns, it’s time to explore the minor scale variations that add depth and emotion to your playing. For beginners, the foundation starts with the natural minor scale patterns, which are straightforward and closely related to the major scale shapes you already know. Once comfortable, you can expand your vocabulary by incorporating the harmonic and melodic minor scales—each bringing unique tonal flavors and new fretboard shapes.
Natural Minor Scale Patterns: The Beginner’s Gateway
The natural minor scale, also known as the Aeolian mode, shares a close relationship with the major scale but creates a distinctly moody and introspective sound. Its formula, W – H – W – W – H – W – W, can be mapped onto the guitar fretboard using similar positional patterns to the major scales, often shifting root notes or finger placement slightly.
- Like the major CAGED system, the natural minor scale can also be visualized in five essential shapes across the neck.
- These shapes allow you to practice the natural minor scale fluidly, connect scale positions, and improvise with greater ease.
- Playing these patterns helps build essential muscle memory for minor key soloing and songwriting.
Starting with natural minor scale patterns builds your confidence and fretboard familiarity—a critical step before diving into more advanced minor scale forms.
Harmonic Minor Scale: Adding Exotic Flair
The harmonic minor scale differs from the natural minor by raising the seventh note by a half step, creating a dramatic and somewhat exotic sound often used in classical, jazz, and metal music. Its formula is:
W – H – W – W – H – WH (1.5 steps) – H
- This raised seventh gives harmonic minor scales a unique “leading tone” that resolves strongly back to the root.
- On guitar, this modification introduces new fingerings within familiar natural minor positions, adding tension and release that enriches your playing palette.
Melodic Minor Scale: Smooth and Versatile
The melodic minor scale is especially interesting because it changes ascending and descending:
- Ascending: It raises both the sixth and seventh notes by a half step compared to the natural minor scale.
- Descending: It often follows the natural minor scale pattern.
Its ascending formula is:
W – H – W – W – W – W – H
- The raised sixth and seventh add a jazzy, sophisticated flavor while still sounding smooth and approachable.
- On guitar, melodic minor shapes can be practiced ascending first, giving you versatility and new melodic options.
Understanding and practicing these three minor scale variations—natural, harmonic, and melodic—equips you with crucial tools for expressing different moods and styles on guitar. Start confidently with natural minor scale patterns to establish a solid base, and then gradually introduce harmonic and melodic minor variations into your practice routine. This layered approach ensures your fretboard skills and musical understanding grow steadily and effectively.
Image courtesy of Méline Waxx
Practical Exercises to Master Scale Shapes
Mastering major and minor scale shapes on the guitar requires more than just memorizing patterns—you need consistent practice with targeted exercises that build muscle memory, accuracy, and speed. Below are some simple yet effective finger exercises and sequences to help you internalize the scale shapes introduced earlier and make them second nature on your fretboard.
Finger Exercise Basics for Scale Mastery
Start slow and focus on clean, precise finger placement. Use a metronome to develop a steady tempo, gradually increasing speed as your fingers grow comfortable. Here’s a foundational approach to practice:
- One-Note-Per-Finger: Assign each finger to one fret within a scale shape to develop finger independence and strength.
- Ascending and Descending: Play the scale ascending from the root note to the octave, then descend back down, ensuring even timing and tone quality.
- Alternate Picking: Use strict down-up alternate picking with your picking hand to improve coordination and speed.
Sample Exercise: Five-Note Sequence Across Major Scale Shapes
Practice a simple 5-note ascending and descending sequence within the major scale shape to reinforce muscle memory and scale familiarity:
- Play notes 1, 2, 3, 4, 5 of the scale ascending.
- Then move back down in reverse order (5, 4, 3, 2, 1).
- Repeat this pattern shifting one string to the right, covering the entire scale shape.
This exercise helps you visualize scale notes horizontally and vertically, promoting fretboard navigation skills essential for improvisation.
Connecting Major and Minor Scales Through Exercises
To fluently switch between major and minor tonalities:
- Practice the relative minor scale shape of each major scale you learn by locating its 6th degree (relative minor root).
- Play the same finger exercises in the corresponding natural minor shape, noticing the subtle tonal differences.
- Repeat harmonic and melodic minor scale fingerings once you feel confident with natural minor shapes.
Tips for Effective Practice
- Consistent Daily Practice: Even 10-15 minutes daily focused on scale exercises can yield significant improvements.
- Use a Backing Track or Metronome: This keeps your timing tight and simulates real musical contexts.
- Record Yourself: Listening back allows you to spot inconsistencies in rhythm or tone.
- Focus on Relaxation: Avoid tension in your hand and wrist to prevent fatigue and injury.
By integrating these practical exercises into your routine, you’ll develop the finger dexterity, muscle memory, and fretboard confidence needed to play major and minor scales effortlessly. This solid technical foundation accelerates your progress toward improvisation, soloing, and songwriting on both guitar and piano.

Image courtesy of Photo By: Kaboompics.com
Connecting Theory to Application: Using Scales in Guitar Playing
Understanding major and minor scales is just the beginning—the real magic happens when you connect music theory to practical guitar playing. Scales serve as the roadmap for soloing, improvisation, and crafting chord progressions, transforming abstract notes into expressive musical ideas. By integrating scales into your playing, you’ll develop fluency in navigating the fretboard, create compelling melodic phrases, and unlock new creative possibilities.
Incorporating Scales into Soloing and Improvisation
When soloing, major and minor scales act as your palette of notes that most naturally fit the song’s key and mood. Here’s how you can apply scales effectively:
- Identify the Key: Determine whether the song or backing track is in a major or minor key. This guides your choice of scale.
- Use Scale Patterns as Frameworks: Improvise within the scale shapes you’ve practiced, experimenting with different note sequences, intervals, and rhythmic accents.
- Emphasize Scale Tones on Strong Beats: Target root notes and chord tones (derived from scales) to anchor your solos harmonically.
- Add Expression: Use techniques like bends, slides, vibrato, and hammer-ons to make the scale notes sound musical rather than mechanical.
By practicing improvisation over backing tracks or simple chord progressions, you’ll train your ear to hear which scale notes fit best and develop the confidence to create melodic, memorable solos on the spot.
Creating Chord Progressions from Scales
Major and minor scales don’t just help with melodies—they’re the foundation for building chord progressions that define the mood and direction of music. Each note of a scale can serve as a root for a chord formed from combining scale notes:
- Major scales give rise to chords that sound bright and resolved, typically following progressions like I–IV–V (e.g., C–F–G in C major).
- Minor scales produce chords with darker or more emotional qualities, often centered around i–iv–v progressions (e.g., Am–Dm–Em in A minor).
By experimenting with chords drawn from the same scale shapes you practice for soloing, you create a cohesive musical environment. This insight empowers you to write songs, accompany other musicians, and improvise solos that harmonize perfectly with underlying chords.
Practical Tips to Link Scales with Playing
- Combine Scale Practice with Chord Shapes: Practice moving between scale runs and chord voicings within the same key to build fluidity.
- Play Backing Tracks in Different Keys: Apply the corresponding major or minor scale to improvise melodies that fit naturally.
- Focus on Relative Scales: Explore the relationship between relative major and minor scales (e.g., C major and A minor share the same notes), broadening your tonal options.
- Record Your Improvisations: Listening back helps identify which scale tones work best in your musical context.
By actively using major and minor scales in soloing, improvisation, and chord progression construction, you'll transform theoretical knowledge into expressive, real-world guitar skills—making your playing more musical, versatile, and fun.
Image courtesy of RDNE Stock project
Common Mistakes and Tips for Efficient Practice
When learning major and minor scales on guitar, beginners often run into common pitfalls that can slow progress and cause frustration. Recognizing these mistakes early—and knowing how to address them—will help you practice more efficiently and build solid, lasting skills.
Common Beginner Mistakes
-
Rushing Through Scales Without Accuracy
Playing scales too fast before mastering clean finger placement leads to sloppy sound and ingrained errors. Prioritize accuracy over speed, focusing on clear note articulation and consistent timing. -
Memorizing Patterns Without Understanding Theory
Merely memorizing scale shapes without grasping the underlying whole step and half step formulas limits your ability to transpose scales and adapt to different keys. Aim to learn both the theory and fretboard application simultaneously. -
Ignoring the Use of a Metronome or Backing Track
Practicing scales without a metronome or backing track can result in poor timing and a lack of musical context. Using these tools improves rhythm, makes practice engaging, and prepares you for playing with others. -
Neglecting Both Hands’ Coordination
Over-focusing on the fretting hand while neglecting picking hand technique diminishes smoothness. Mechanical practice of alternate picking or fingerpicking alongside scale fingering is essential for fluid playing. -
Practicing Too Long in One Position
Staying fixed in a single scale shape limits fretboard knowledge and improvisational freedom. Make it a goal to connect scale shapes across the neck, moving horizontally and vertically.
Tips for Efficient and Rewarding Scale Practice
- Set Clear Practice Goals: Break your practice into focused segments—warm-up, scale patterns, improvisation. This prevents overwhelm and tracks progress.
- Use Slow Practice with Gradual Speed Increase: Start at a tempo where you play flawlessly, then incrementally increase speed to build accuracy and endurance.
- Visualize Intervals and Scale Degrees: As you play, mentally identify root notes, thirds, fifths, and other scale tones to deepen theory integration.
- Rotate Major and Minor Scale Practice: Alternate practicing related major and minor scales (like C major and A minor) to understand their connection and improve versatility.
- Apply Scales Musically: Regularly improvise or compose small melodies using the scales you learn, reinforcing practical use instead of rote repetition.
- Stay Relaxed and Maintain Good Posture: Tension slows your fingers and causes fatigue. Relaxed hands and correct posture enhance endurance and tone quality.
By avoiding these common mistakes and adopting targeted practice strategies, beginner guitarists can efficiently master major and minor scales, build solid fretboard knowledge, and maintain motivation. Efficient practice empowers you to play musically and confidently, transforming scales from tedious drills into a foundational tool for creative guitar playing.

Image courtesy of Photo By: Kaboompics.com
Quick Overview: Relating Guitar Scales to Piano
If you’re learning major and minor scales on guitar, understanding their similarity to piano scales can significantly enhance your multi-instrumental musical knowledge. Both guitar and piano share the same fundamental scale formulas and interval patterns — whole steps and half steps define major and minor scales identically on both instruments. This universality provides a common language across the fretboard and keyboard, allowing you to transfer scale concepts fluidly between guitar and piano.
How Scale Patterns Translate Between Guitar and Piano
- On the piano, scales are visualized linearly: white and black keys arranged from low to high pitch. Each whole or half step corresponds to moving to the next adjacent key or skipping one.
- On the guitar, scales wrap around the fretboard in patterns spanning multiple strings and frets, but the interval distances remain the same—two frets equal a whole step; one fret is a half step.
- Both instruments use the same note names and octave relationships, so once you grasp the scale formula (e.g., W–W–H–W–W–W–H for major scales), you can apply it seamlessly across piano keys or guitar frets.
Why This Matters
Understanding the shared theory behind guitar and piano scales helps:
- Develop versatile musicianship, opening opportunities to play or compose on either instrument.
- Strengthen your grasp of intervals and scale construction, since seeing the scale visually on piano keys complements the pattern-based understanding on guitar.
- Accelerate learning, especially if you already know piano—or vice versa—as recognizing scale shapes and scale degrees become intuitive across both.
- Enhance ear training and sight-reading skills, since the piano’s linear layout often aids in conceptualizing pitch relationships, which you can then translate to guitar fretboard navigation.
By relating scale patterns across guitar and piano, you build a more holistic musical foundation—allowing you to approach scales not just as isolated shapes but as interconnected sonic tools. This cross-instrument insight deepens theoretical understanding and expands your creative possibilities, whether you’re jamming in a band, composing, or practicing solo.

Image courtesy of Oscar Steiner